
08 Aug Flush-cutting Without Frustration
Flush-cutting Without Frustration, cutting wedges, plugs or dowels flush with the surrounding surface is a source of great frustration for many woodworkers. Either you leave way too much of the plug behind, or you chew up the surrounding surface with the saw’s teeth.
Sometimes you can plane or sand away the damage (or the excess material). But sometimes you cannot. And wouldn’t you rather leave a perfect surface behind in the first place?
Like you, I struggled with this problem for many years and tried many solutions. When I build a chair, I might have to flush more than a dozen wedges and through-tenons. So I needed to crack this nut.
The Problem
It’s best to understand why this problem occurs because it will help you avoid bad technique. First problem: advertising. Many ads for flush-cutting saws show them being used in silly ways. In general, you don’t bend the blade as shown in the ads. Bending the blade can damage the saw and will steer the teeth off track. Keep the blade flat.
Second problem: The set of the teeth. Some flush-cut saws have no “set” to their teeth while other saws have teeth that are set to one side only. Both saws will work, but if your saw has set, you need to know it and you need to mark it on your saw. If you put the face of the blade that has set on your work, you will scratch it instantly.
Third problem: We clog the teeth. There are many ways that flush-cut saws can wander in the cut. The most common way is that the gullets get filled with sawdust and the saw starts to behave erratically. Keep the teeth clear of sawdust (and glue).
he Solution
The best fix is to use two saws: One for removing the bulk of the material and a second finer saw for cleaning up what’s left. While I’ve never found flush-cutting saws that I adore, the best combination I have tried is from Lee Valley. This saw for the rough work and the single-edge saw on this page for the fine work.
To remove the bulk of the material, apply some blue tape around the dowel or tenon to protect the surface. Use the coarse saw to remove as much material as you can. Do not bend the blade. Keep it flat against the tape.
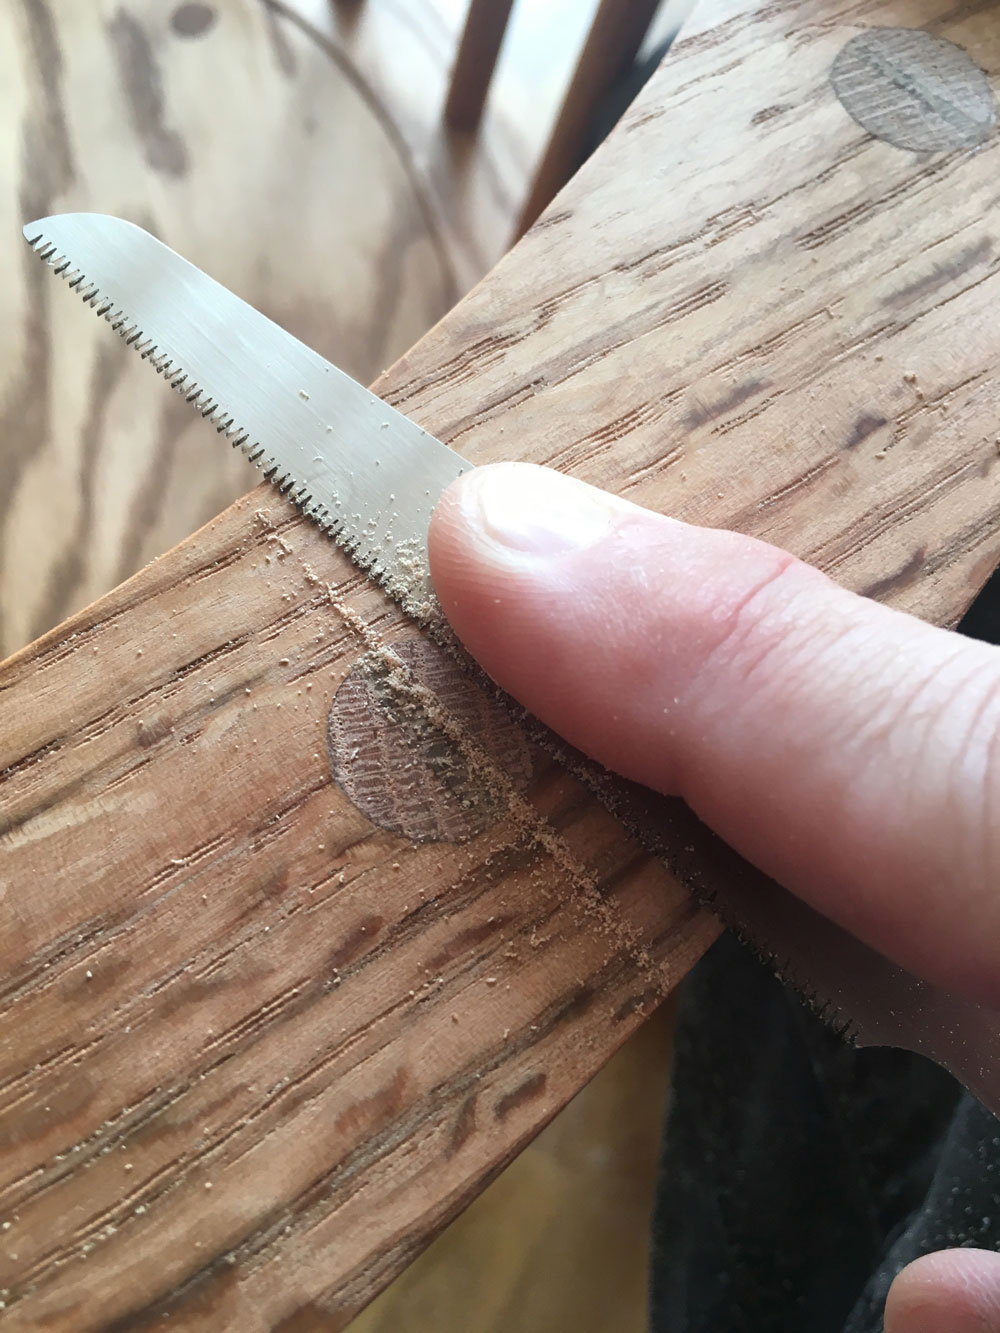
Now remove the tape and get the small fine saw. The goal here is to nibble away what is left. This saw has no set, so it won’t scratch the surface if you keep the blade flat against your work. How do you do that? Don’t use the handle. Don’t even touch it. Instead, use your fingers to both press the blade flat against the work and to move the blade back and forth.
Take your time until you get a feel for it and keep the teeth clear of sawdust.
The result is a perfectly flush surface without a single errant scratch. And that is worth the extra effort.
No Comments